I believe every household in India has Aloe Vera planted in their garden or in their kitchen or in corridor which I have seen while visiting my relatives, or friends house.
I was very young when I asked my father why we had planted this plant as it has no flowers and it’s not that pretty. Then my father explained to me the benefits of this plant and to why it is available in every household in my neighborhood as well.
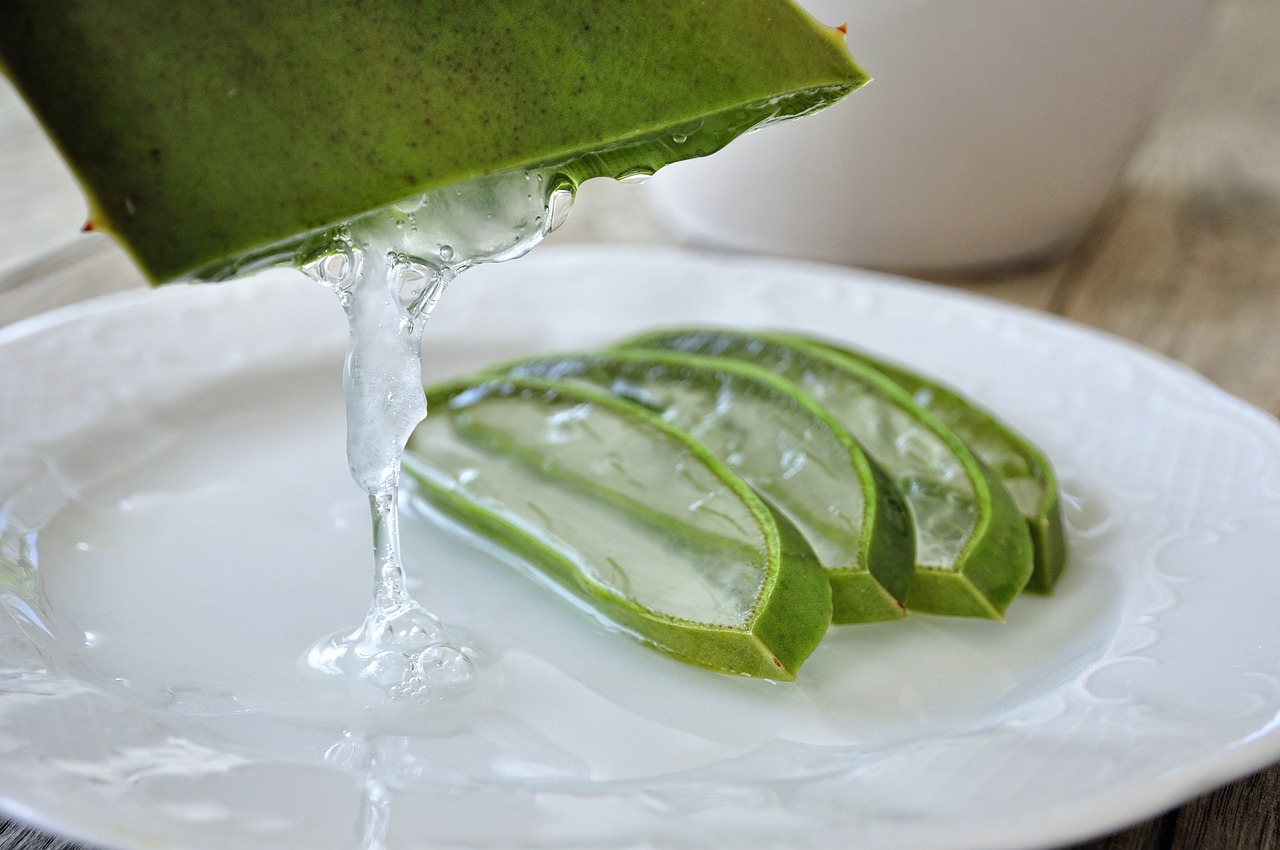
Back then as I entered my teens I got a little bit of acne and redness on my face. My mother told me to get one Aloe Vera leave from the garden. I was already curious to learn about that so I asked her to do it own my own and carefully peeled the spiky edges of the leaves. I scoop some gel out from the leave with a spoon and knife and put that in jar. My mother told me to apply this in evening before going to bed. On her instructions I at night time I cleaned my face and applied Aloe Vera gel for the first time on my face and there I felt soothing sensation from that gel.
Over the next few weeks, I made it part of my night skincare routine. I started noticing some remarkable changes on my face over the next months. The redness and pimples were vanished and moreover my skin felt softer and more hydrated day by day.
From those days I made Aloe Vera gel a part of my skincare routine. These are the STEPS I follow to make aloe vera gel at home.
Firstly here’s the list of things we need:
- Aloe Vera leaves (I take two and make it for 2 weeks in between I use that for hair as well)
- A sharp knife
- A clean cutting board
- A blender
- Bowl
- Glass jar for storage
- Spoon
Instructions of making Aloe Vera Gel at home:
Step 1- Select Fresh Aloe Vera Leaves:
- Choose mature Aloe Vera leaves that look healthy and free from discoloration like go for those which are vibrant green color. The leaves which are wide and larger usually contain more gel.
Step 2- Prepare the Aloe Vera Leaves and Extract the Gel:
- First, wash your hands and then place the Aloe Vera leaves flat on a cutting board. If you have a bamboo cutting board go for that instead of a other one.
- For cutting use a sharp knife, to cut off the spiky edges and the base of the leaves to create flat side. (But be careful while handling knife as while extracting gel as it may slips from hands. The hold should be strong to the knife)
- Cut the leave in two three sections so it will be easy to get clear Aloe Vera Gel
- Use a spoon or a knife to carefully scoop out the gel from the leaves and if there is a yellow latex layer remove it, as it is irritating to the skin.
Step 3- Rinse and Blend the Gel:
- Place the gel in a clean bowl.
- Rinse the gel if there is any yellow latex left which is still there with the gel.
- Transfer the rinsed aloe Vera gel to a blender.
- Blend the gel until it becomes smooth and has a gel-like consistency.
Step 4- Store the Aloe Vera Gel:
- Transfer the freshly made Aloe Vera gel into a clean glass container or jar. Ensure that the container is properly closed.
- Store the Aloe Vera gel in the refrigerator to extend its shelf life. My aloe Vera gel typically lasts for 2 weeks when refrigerated.
So at the end I can only say that making aloe Vera gel at home is easy and can help you reduce the expense of skincare with natural home made gel from this magical plant. There are so many other ways as well to use this as I sometimes use it for my hair as to treat dandruff and for promote good hair health.
By following the steps outlined in this guide, you can create aloe Vera gel that’s free from harmful additives and which can naturally enhance your skincare and haircare routine right from your garden.